Ductile Iron Pipe Dimensions, Pressure Ratings & Engineering Calculations
This page provides engineering reference information for ductile iron pipes, including size specifications, pressure ratings, wall thickness calculation formulas, pipe weight calculation methods, and fitting data.
All data and formulas are aligned with internationally accepted ductile iron pipe design practices under ISO 2531, EN 545, and EN 598.
This content is intended to support pipeline design, specification selection, and technical evaluation for water supply, sewage, irrigation, and municipal infrastructure projects.
1. Overview of Size & Pressure Classification
Ductile iron pipes are specified using:
- Nominal Diameter (DN) – size reference for pipeline design
- Wall Thickness Class (K Class / C Class) – structural and pressure-related classification
- Pressure Rating – allowable working pressure under defined conditions
These parameters work together to ensure that ductile iron pipelines achieve the required strength, safety margin, and long service life.
2. Engineering Design & Calculation Reference
2.1 Calculation formula of K-grade pipe wall thickness
For ductile iron pipes designed according to K class, wall thickness is calculated using the following formula:
Wall thickness calculation formula: | e=K(0.5+0.001DN) |
e: | Nominal wall thickness, mm (minimum nominal wall thickness is 6mm) |
DN: | Nominal diameter, mm |
K: | Wall thickness grade, integer: 7, 8, 9, 10, 11, 12 |
Minimum wall thickness: | When e=6mm, the minimum wall thickness is 4.7mm |
Where:
- e = pipe wall thickness (mm)
- K = thickness coefficient (K7 / K8 / K9)
- DN = nominal diameter (mm)
This formula is widely used in ISO and EN-based ductile iron pipe design to determine minimum wall thickness based on nominal diameter and selected K class.
2.2 Pipe weight calculation formula
Pipe weight is an important parameter for transportation planning, lifting, and installation design.
Pipe Weight Calculation
Pipe weight calculation formula: | 3.14×{[(2000DN)2−2000(DN−2e)2]}×6×7050+W (W represents socket weight) or 3.14×{[(2000DN)2−2000(DN−2e)2]}×6×7050+socket weight |
Pipe weight calculation formula: | Pipe weight = straight pipe weight + socket weight |
Straight pipe weight: | Straight pipe volume × density, density: 7050Kg/m3 |
Straight pipe volume: | Outer circle volume - inner circle volume |
Outer circle volume: | 3.14×(2000DN)2×6 |
Inner circle volume: | 3.14×(2000DN−2e)2×6 |
Unit conversion: | 1000mm=1m |
Where:
- G = pipe weight
- D = outside diameter
- e = wall thickness
- L = pipe length
- ρ = density of ductile iron
This formula provides a theoretical weight reference. Actual pipe weight may vary slightly due to manufacturing tolerances.
2.3 Hydrostatic Pressure & Test Pressure
Ductile iron pipes are designed to safely withstand both working pressure during normal operation and hydrostatic test pressure during testing and commissioning.
Working Pressure
The maximum internal pressure that the pipeline can continuously withstand under normal operating conditions.
Hydrostatic Test Pressure
A higher pressure applied during factory or site testing to verify pipe integrity and sealing performance.
Pressure performance is influenced by:
- Wall thickness class (K class / C class)
- Nominal diameter (DN)
- Mechanical properties of ductile iron
- Safety factors defined by applicable standards
- Pressure data should always be verified against the relevant standard tables.
Table Type:Hydrostatic Pressure vs Test Pressure – General Reference
Specification DN | Minimum pressure at K = 7 (MPa) | Minimum pressure at K = 8 (MPa) | Minimum pressure at K ≥ 9 (MPa) | Minimum test pressure of class C pipe(MPa) | |
Recommended pressure rating | Pressure (for class C pipe, MPa) | ||||
DN80-DN300 | 3.2 | 4.0 | 5.0 | C40 | 4 |
DN350-DN600 | 2.5 | 3.2 | 4.0 | C30 | 3 |
DN700-DN1000 | 1.8 | 2.5 | 3.2 | C25 | 2.5 |
DN1100-DN2000 | 1.3 | 1.8 | 2.5 | ||
DN2200-DN2600 | 0.8 | 1.3 | 1.8 | ||

3.Pipe Specifications – K9 Class (T-Type)
3.1 T-Type Centrifugal Ductile Iron Pipes – K9 Class
Here is the English table:
DN | Nominal wall thickness (mm) | Deflection angle θ (°) | Outer diameter of barrel of pipe DE (mm) | External diameter of socket D (mm) | Socket depth P (mm) | Lu Effective length |
80 | 6.0 | 3°30' | 98 | 140 | 85 | 6 |
100 | 6.0 | 118 | 163 | 88 | 6 | |
125 | 6.0 | 144 | 190 | 91 | 6 | |
150 | 6.0 | 170 | 217 | 94 | 6 | |
200 | 6.3 | 222 | 278 | 100 | 6 | |
250 | 6.8 | 274 | 336 | 105 | 6 | |
300 | 7.2 | 326 | 393 | 110 | 6 | |
350 | 7.7 | 2°30' | 378 | 448 | 110 | 6 |
400 | 8.1 | 429 | 500 | 110 | 6 | |
450 | 8.6 | 480 | 540 | 120 | 6 | |
500 | 9.0 | 532 | 604 | 120 | 6 | |
600 | 9.9 | 635 | 713 | 120 | 6 | |
700 | 10.8 | 1°30' | 738 | 824 | 150 | 6 |
800 | 11.7 | 842 | 943 | 160 | 6 | |
900 | 12.6 | 945 | 1052 | 175 | 6 | |
1000 | 13.5 | 1048 | 1158 | 185 | 6 | |
1100 | 14.4 | 1152 | 1270 | 202 | 6/8.15 | |
1200 | 15.3 | 1255 | 1378 | 217 | 6/8.15 | |
1400 | 17.1 | 1462 | 1600 | 242 | 6/8.15 | |
1500 | 18.0 | 1565 | 1710 | 253 | 6/8.15 | |
1600 | 18.9 | 1668 | 1821 | 266 | 6/8.15 | |
1800 | 20.7 | 1875 | 2043 | 297 | 6/8.15 | |
2000 | 22.5 | 2082 | 2262 | 319 | 6/8.15 | |
2200 | 24.3 | 2288 | 2482 | 328 | 6/8.15 | |
2400 | 26.1 | 2495 | 2702 | 346.5 | 6/8.15 | |
2600 | 27.9 | 2702 |
4. Pressure Rating Tables
4.1 Pressure Rating – K9 Class Pipes
Pressure Data sheet for T-type centrifugal ductile iron pipes (Grade K9)
DN | Allowable operating pressure PFA (MPa) | Maximum allowable operating pressure PMA (MPa) | Minimum stiffness S (KN/m²) | Maximum Allowable deflection % |
80 | 6.4 | 7.7 | 2400 | 0.85 |
100 | 6.4 | 7.7 | 1350 | 1.05 |
125 | 6.4 | 7.7 | 800 | 1.30 |
150 | 6.4 | 7.7 | 480 | 1.55 |
200 | 6.2 | 7.4 | 230 | 1.90 |
250 | 5.4 | 6.5 | 155 | 2.22 |
300 | 4.9 | 5.9 | 110 | 2.50 |
350 | 4.5 | 5.4 | 88 | 2.70 |
400 | 4.2 | 5.1 | 72 | 2.90 |
450 | 4.0 | 4.8 | 61 | 3.00 |
500 | 3.8 | 4.6 | 52 | 3.00 |
600 | 3.6 | 4.3 | 41 | 3.00 |
700 | 3.4 | 4.1 | 34 | 3.00 |
This table shows the allowable working pressure and test pressure for K9 class ductile iron pipes under standard conditions.
4.2 Pressure Rating – C Class Pipes
DN | Preferred pressure rating | Nominal wall thickness (mm) | Minimum wall thickness (mm) |
80 | C40 | 4.4 | 3.0 |
100 | C40 | 4.4 | 3.0 |
150 | C40 | 4.5 | 3.0 |
200 | C40 | 4.7 | 3.2 |
250-1800 | Due to space constraints, the full ductile iron pipe specs table can't be displayed here. For complete data, please contact us. | ||
2000 | C25 | 21.8 | 18.5 |
2200 | C25 | 23.8 | 20.3 |
2400 | C25 | 25.8 | 22.1 |
2600 | C25 | 27.9 | 24.0 |
C class pipes are classified primarily by pressure rating and are widely used in EN-based pipeline designs.
5. Ductile Iron Pipe Fittings Data
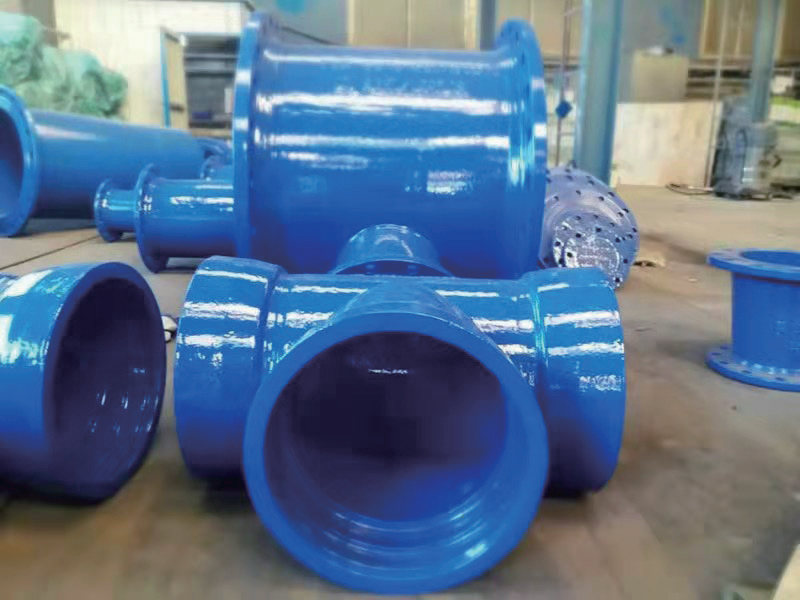
Ductile Iron Pipe Fittings – Dimensions & Weight
Type of fittings | DN | Effective length deviation (mm) |
Flanged sockets, flanged spigots collars, tapers | 80 - 1200 | ±25 |
Tees | 80 - 1200 | +50 - 25 |
90° bends (1/4) | 80 - 2600 | ± (15 + 0.03DN) |
45° bends (1/8) | 80 - 2600 | ± (10 + 0.025DN) |
22.30° (1/16) and 11.15° (1/32) bends | 80 - 1200 | ±(10 + 0.02DN) |


6. Engineering Notes & Standard Reference
All formulas and tables are provided for engineering reference.
Final pipe selection and pressure design should be confirmed according to project specifications and applicable standards such as ISO 2531, EN 545, and EN 598.
7.Frequently Asked Questions (FAQ)
How is K class wall thickness calculated?
Wall thickness is calculated using the K class formula based on nominal diameter and thickness coefficient.
What is the difference between K class and C class pipes?
K class defines wall thickness based on diameter, while C class classifies pipes primarily by pressure rating.
Can higher class pipes be used for lower pressure systems?
Yes. Higher class pipes can be used to provide additional safety margin.
